GLUTEN FREE ARTISAN BREAD
Get your tissues out because this bread is so good, it’s going to make you cry (happy tears). For those of you who can have gluten, head to the notes section to learn how to adapt this into a traditional recipe. No matter how you slice it, it’s easy and delicious!
Servings: 1 loaf
Prep time: 10 minutes
Rise time: 3 hours
Optional rest time: Up to 3 days in refrigerator
Bake time: 50 minutes
Skill level: Easy
INGREDIENTS
3 cups GLUTEN FREE FLOUR BLEND, plus additional for kneading
2 teaspoons INSTANT/RAPID RISE YEAST
2 teaspoons KOSHER SALT or VERA SALT (not table)
1 Tablespoon PSYLLIUM WHOLE HUSK FIBER (not powder)
1 Tablespoon SUGAR
2 cups WARM WATER, divided
DIRECTIONS FOR THE DOUGH
In a large glass bowl, combine all ingredients working from dry to wet and using only 1 1/2 cups of the water.
Depending on the humidity of your locale, you may need less than 2 cups or, you may require the full amount of water. Just add a little at a time until you reach the goal of a dough that is more like a sticky dough batter - not soupy and runny but not a distinct ball. It will be kind of pastey. That’s ok as long as it is well blended and holds together.
Leave the dough in the bowl and cover with plastic wrap, a plate, or a lid - if your bowl has one.
Place in a warm, draft-free place for up to 3 hours; the dough will be ready when it has expanded to about double in volume.
DIRECTIONS FOR BAKING IF REFRIGERATED FIRST
If not baking right away, dough will keep in the refrigerator, covered for up to 3 days.
When ready to bake, pull the dough out of the refrigerator and allow to come to room temperature for about 1 hour. This is a good time to preheat the oven.
Follow the directions below for baking.
DIRECTIONS FOR BAKING
Place an oven safe container, filled about 1/2 way with water, into the oven. Doesn’t matter the size, just so there is enough water to create a moist environment. I usually have about 2 cups in an old pot.
Next to the water, place a dutch oven without the lid (keep it handy, you’ll need it later)
Preheat the oven to 450 degrees with both items in the oven.
While preheating, either straight from the rise or after having removed from the refrigerator and left to come to room temperature, scrape and dump the dough from the bowl onto a lightly floured surface.
Sprinkle a little flour on top so it is not too sticky to handle but don’t douse to where it upsets the balance.
Using a spatula, dough scraper, or lightly floured hands, begin shaping the dough, working inwards to form it into a round or oval shape. It doesn’t have to be perfect, just something that deflates the air bubbles, resembles an artisanal loaf, and is easy to transfer. It should be more smooth now and look more like dough.
Remove the dutch oven from the oven and lightly grease the bottom and sides of the pot with coconut or olive oil OR place the dough onto parchment paper.
Place the bread into the hot pot, cover it with a lid, and put it back in the oven.
Bake for 30 minutes with the lid.
Remove lid and bake 17-20 minutes more or until bread taps hollow and the underside is lightly browned.
Remove from oven and lightly baste with butter or coconut butter/oil (optional)
Cool, preferably on a rack, before slicing, about 10-20 minutes.
NOTES/VARIATIONS
WARM WATER means 100 -110 degrees.
It is best to use raw, organic sugar; organic (or at least non-GMO) flour; organic psyllium whole husk fiber, kosher sea salt (such as Celtic, Redmonds) or my personal favorite, Vera Salt; quality water; liquid coconut oil for greasing; grass fed/organic butter or coconut butter for basting.
A word about gluten free flour. I tested this recipe using Caputo but you can try other blends. Where I caution you is that not all blends are created equal so your results may not be the same from flour to flour. As well, it is best to avoid added gums and fillers which is sadly common in gluten free preparations. Caputo does have some gum, so I use it sparingly. I am on a quest to create a blend that works well 1:1 in all recipes, including this one, and doesn’t have the need for gums.
If making regular gluten bread, simply swap the flour 1:1 with regular, organic bread flour, omit the psyllium husk, and it’s up to you if you want the sugar or not. They bake the same. I’ve made it both ways and everyone reports it’s not terribly noticeable one way or another but, according to my taste-testers, both with and w/o sugar versions are equally delicious.
Previously used, clean bread loaf bags work well for storing the bread
Facts about yeast:
Unless otherwise stated, baker’s yeast (the kind used in this recipe) is naturally gluten free.
Yeast can be stored in the freezer and it’s the best place to keep it. Frozen yeast takes a little longer to come to life (proof) as the cold makes it dormant, so plan accordingly.
Wild yeast (the kind that comes through the air during the fermenting process) is also naturally gluten free.
I have used Fleischmann’s, Red Star, and store brand yeasts. All work well but my latest sourdough starter was kicked off from a jar of Meijer’s store brand active dry yeast (which I keep in the freezer) and it has been, by far, the best starter I can recall making. It was so happy and so was I! This same brand works just as effectively in this recipe.
For more cool insights, check this out!
As articulated in the What’s for Dinner article, always aim for the highest quality ingredients.
CREDITS/REFERENCES
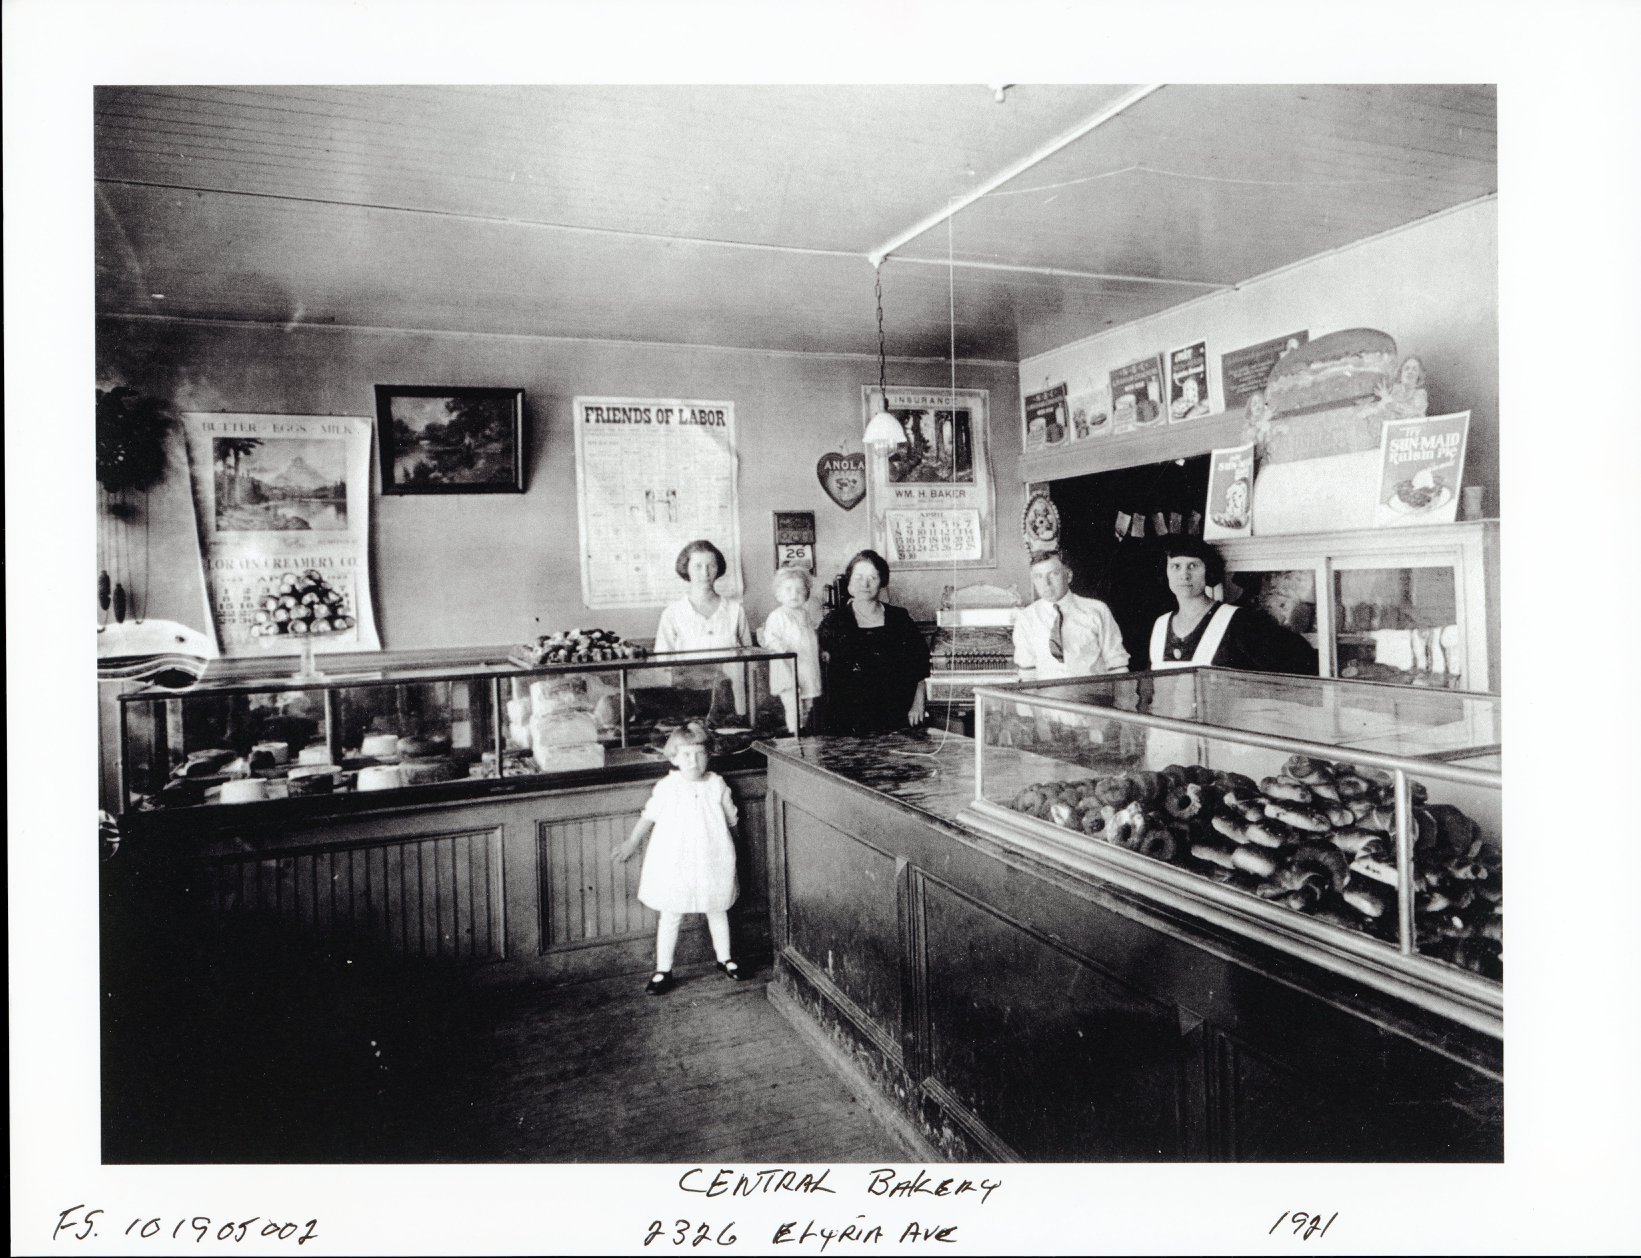
Thumbnail photo credit: The thumbnail photo is from my great-grandparent’s (Edward and Teofila Kowalski) bakery in Lorain, Ohio, circa 1920’s. It was called Central Bakery. My Babči and Dziadzi are pictured, along with an uncle (the baby) and my grandmother, Wanda (little girl in front).
The original recipe can be found at www.recipetineats.com - World’s Easiest Yeast Bread Recipe - Artisan - NO KNEAD. I was in search of a new bread recipe and this one was so well done by way of explaining and execution, I used it as the basis for my own version.